| read the discalimer | the problem | use tee nuts | mounting the nuts | conclusion |
All trademarks mentioned and links are presented here for informational purposes only and to confirm statements made by the author. The author of these pages DOES NOT receive any remuneration from the mentioned brands and the listed links.
In any case if you decide to use the suggestions on this page you do so at your own risk. Repairing electronic equipments, even just opening it, can put your life at risk, so don't do it.
If you do not accept and/or not understand the statements in this disclaimer, written in blue, exit this page immediately.
Everything exposed in this web page is only a suggestion, probably you won't obtain the aim from you prefixed following it.
A true collector is looking for a) original items without any replaced parts, b) or if a Critical Restoration has been done that it is possible to go back to the original version. Lacking the previous 2 statements the object (not only for me) has a value of zero euros.
Be very careful when buying a vintage, antique or historic loudspeaker. After 40 or 50 years, the magnets suffer from demagnetisation and the neoprene suspensions are now a wooden ring, the plissé and impregnated silk has opened up in the folds, and the foam, now sticky like bitumen, will drive the repairer crazy.
And the worst is yet to come: oversized broken coils, oval or square suspensions that are impossible to find, cardboard cones with impossible angles. And there is no cure for everything.
Beautiful speakers, with captivating sound when new, but a proper restoration can cost much more than the car itself, as in the case of this Fiat 500B.
Having decided to update the internal crossover by doing some tests and changing two or three types of cables, we have to dismantle and reassemble the woofer many, many times.
Since the drivers need to be removed frequently, the screw holes in the wood can give way. Some TDLs, such as mine (and concert speakers), are equipped with 4 mm spider nuts (T-nuts, tee-nuts) which, with a little patience, are easy to find and fit, ensuring greater solidity.
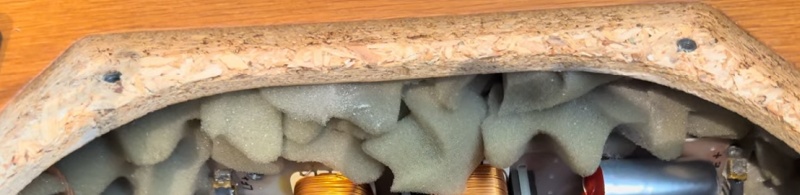 |
| Fig.1, from the internet, a photo of a speaker with a chipboard cabinet |
We are not interested in delving into the various types of wood we have seen used to build boxes for HiFi or concerts, such as Particle Board, the Oriented Strand Board, the Oriented Structural Straw Board (rarely used in cabinets), the Oriented Strand Board (never used), the expensive Laminated Veneer Lumber, magnificent cabinets made from Cross Laminated Timber.
Not to mention one of the most commonly used materials in high-quality speaker cabinets, the Plywood, or the more economical and widely used MDF. We do not mention the DIN 68763 (EN 317) standard for V100, V70 and V20 chipboard.
Assembly with this type of bolt and nut is also recommended by loudspeaker manufacturers, such as the KEF B139 we talk about so much.
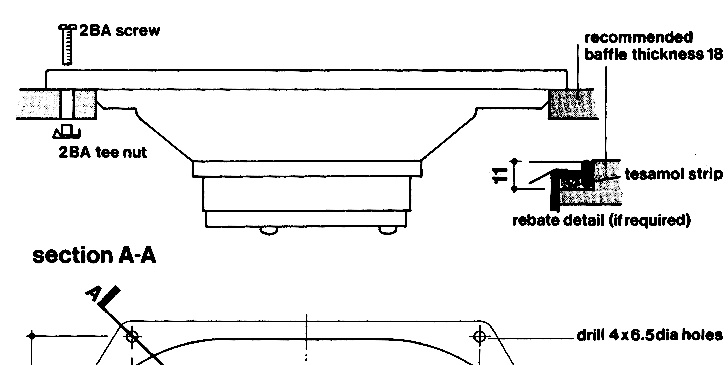 |
| Fig.2, There is a lot to read in this drawing: on the left are the tee-nuts, on the right is the rebate for recessing the driver, the thickness of the wood and the sealing gasket |
But let's look at some examples of these nuts, even though there are similar ones that are mounted opposite each other, but they are expansion nuts and not suitable for many screw-on/unscrew-off applications.
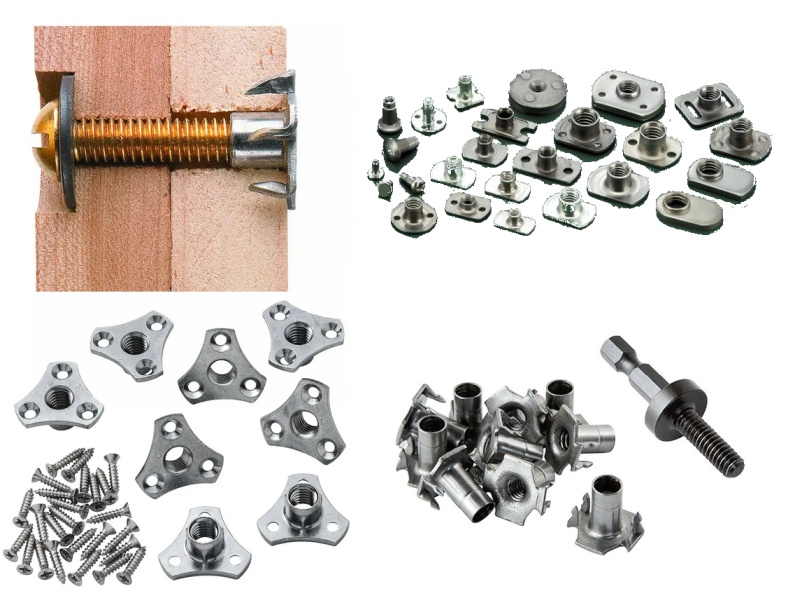 |
| Fig.3, There are many different types for different needs. We are interested in the model at the top left, but at the bottom right we see that there are tools for assembly. We will build it ourselves |
How can they be installed without damaging the box and with a secure fastening?
The most common cabinets are made of MDF or chipboard and have a recess for mounting the woofer or other drivers flush (as they should be), which means that ...... there is little wood left for the screws!
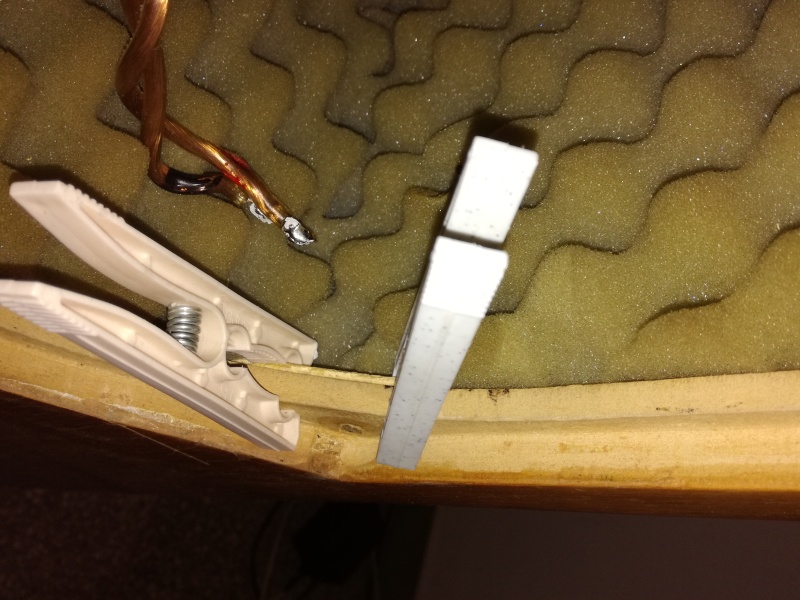 |
| Fig.4, from the well-known woodworking shop, we obtain some scraps of 4mm birch plywood and cut them into triangles measuring approximately 5 or 6 cm per side, preferably rounded. Using professional clamps, such as those shown in the photo, and vinyl glue we attach them behind the existing hole, flush with the edge |
The day after the glue has dried, drill a 3 mm through hole using the original screw holes. Then prepare the base for embedding the nut.
 |
| Fig.5, With a drill bit inserted through the hole, turning at minimum speed and pulling outwards, we make a recess for the nut so that it does not damage the new plywood when tightening |
Now you need a long bolt to pass through the hole, screw on the spider nut and pull by hand to insert it into the seat shown in fig. 5. Be careful not to drop it, as it would be difficult to retrieve.
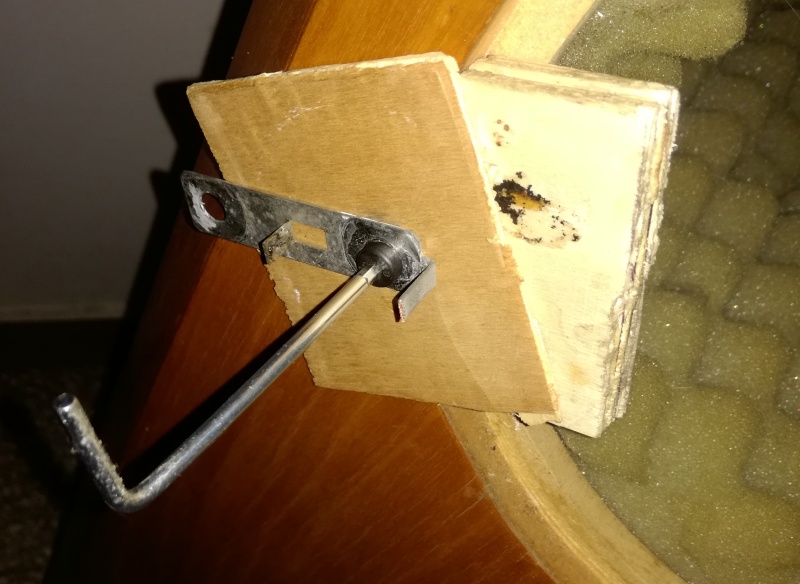 |
| Fig.6, we need to build a tool that will pull the spider without putting strain on the thin piece of wood. We overlap and glue together several pieces of plywood until we reach the thickness of the recess, then we add another piece and a kind of metal washer and, using the long bolt, we pull the nut BY HAND until its teeth sink into the wood |
Patiently repeat the process on the four bolts and use a mirror or photograph to check that you have tightened them properly.
 |
| Fig.7, And here is the result, which is durable since we also increased the thickness at that delicate point |
Reassemble the woofer by tightening the bolts by hand.
 |
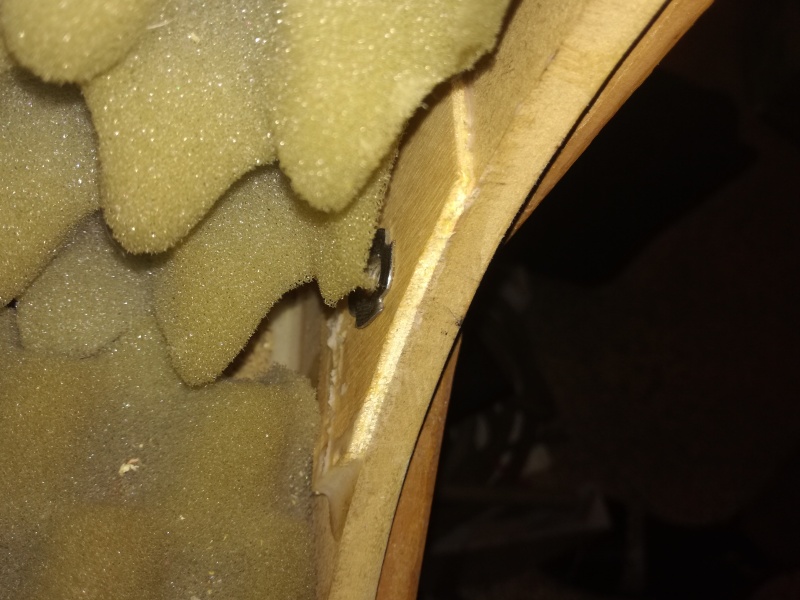
| Fig.8, the woofer fixed but without tightening the new bolts completely |
Now that you know how to do it, good luck!
| In the last years at Universita' Degli Studi di Roma La Sapienza |
Dr. G. Visco already contract professor for Chemistry in Environment & Cultural Heritage into ---------> |
Laurea Degree Course of Sciences Applied to Cultural Heritage for Diagnostic and for Conservation |